
How aListEngine Mobile Sync Works and Where Your Photos Go
Learn how mobile photos sync to aListEngine, where to find them in web Imports, and how an uploaded batch becomes draft listings.
In this article
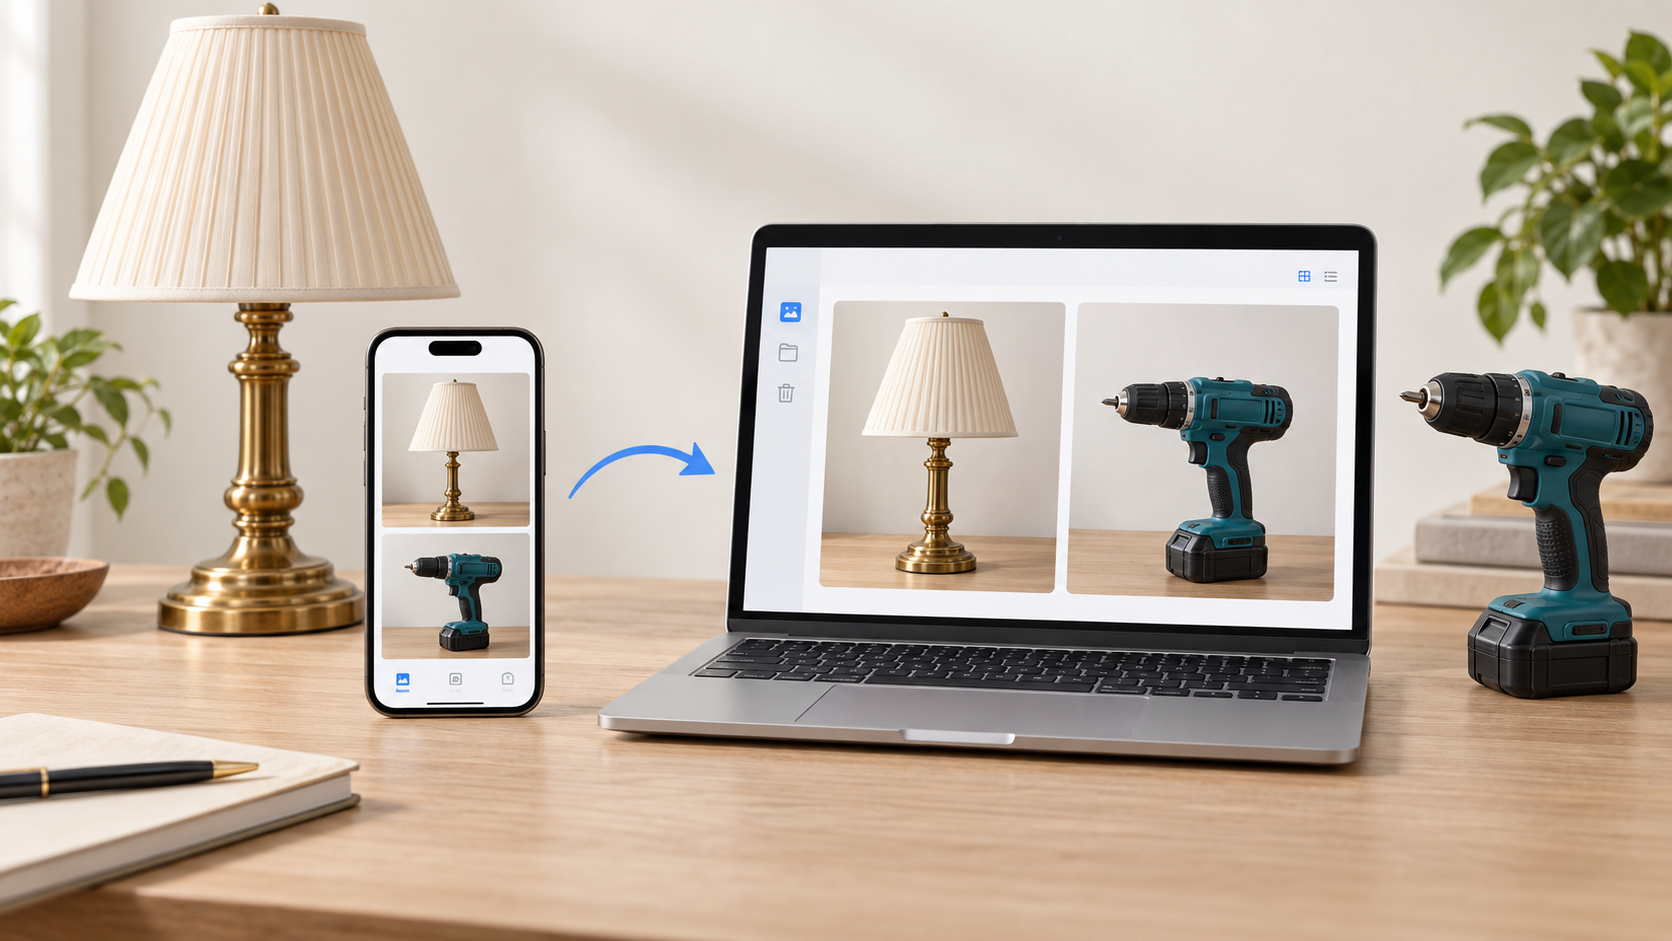
Capture on mobile → sync → open the import on the web → create draft listings.
Use your phone to photograph items and record notes. Use the web app to review photos, create listings, and prepare exports.
1. Check your photos on mobile
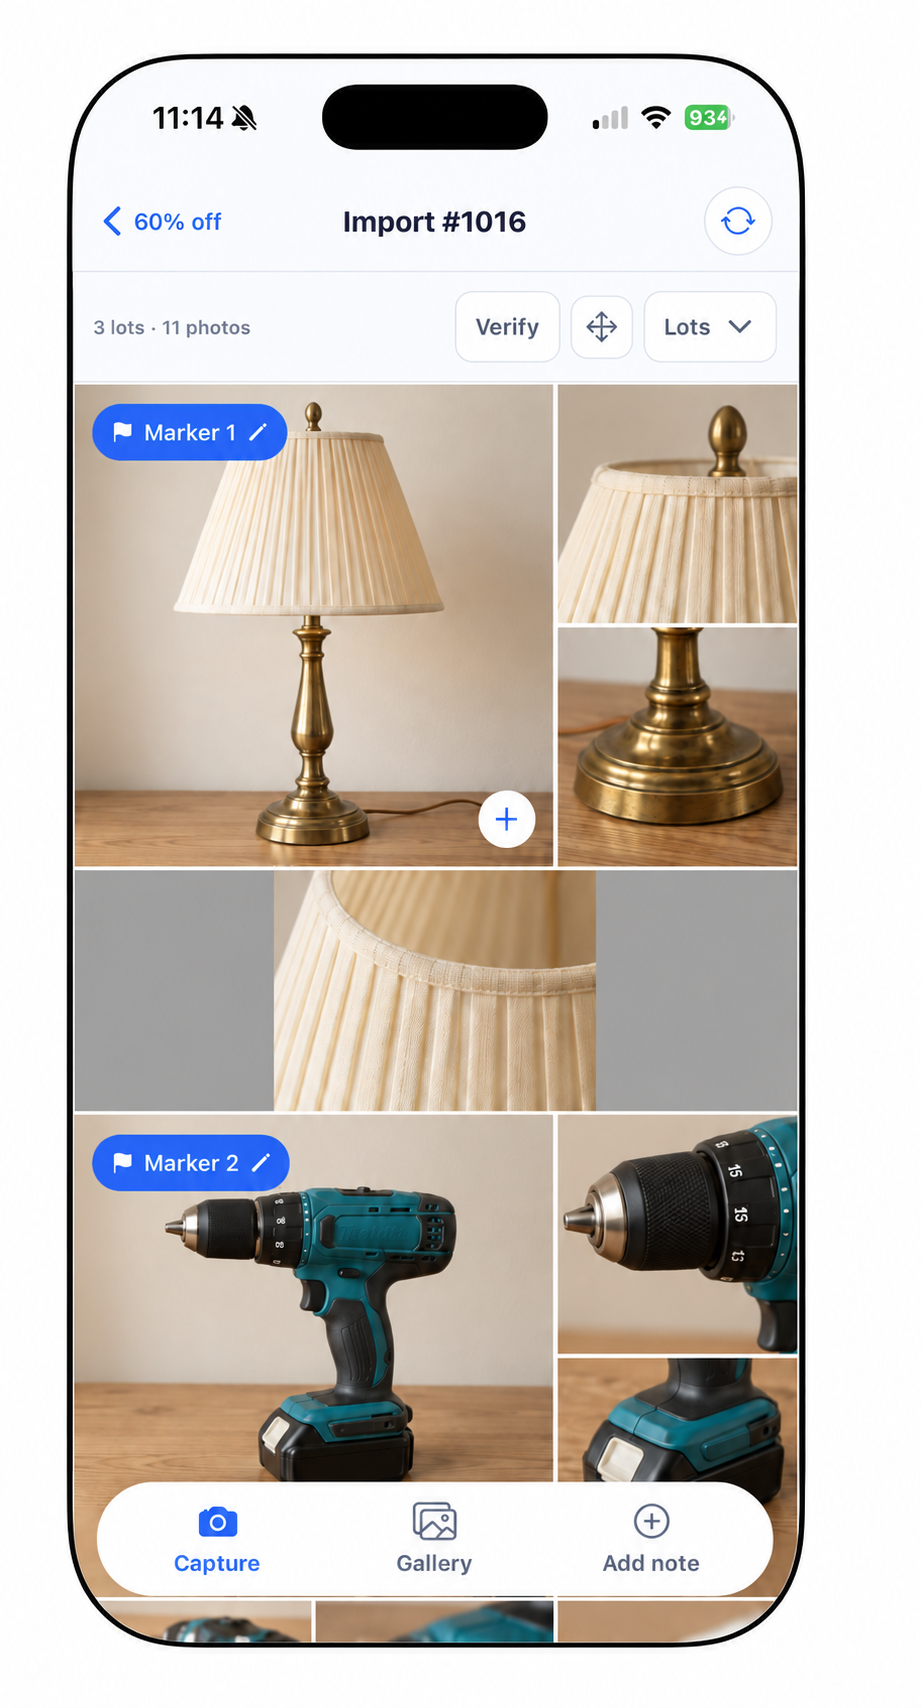
Keep photos of each selling unit together. Note the folder and import number so you can find the batch on the web.
Photos save on your phone first, so you can capture offline. They reach the web after syncing.
2. Choose how to sync
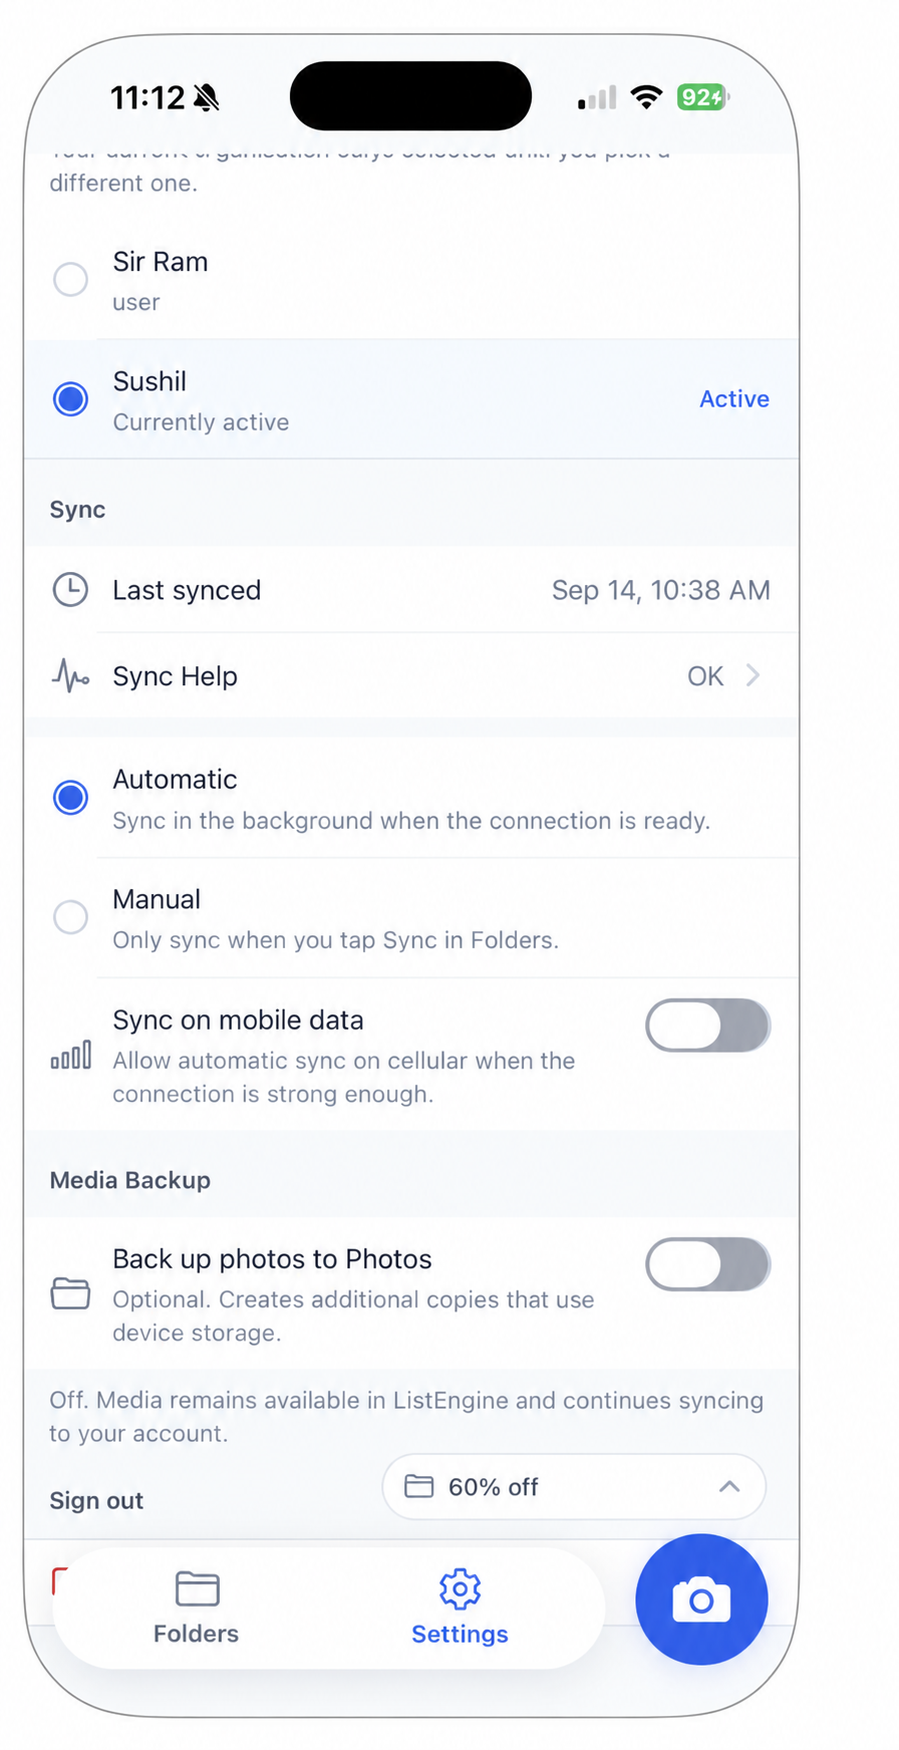
Automatic starts syncing when the connection and settings allow it. Manual lets you start with Sync in Folders.
Turn on Sync on mobile data to allow automatic uploads over a suitable cellular connection, or connect to Wi-Fi. Keep the app open while a large batch finishes. Check Sync Help if work remains pending.
3. Find your import on the web
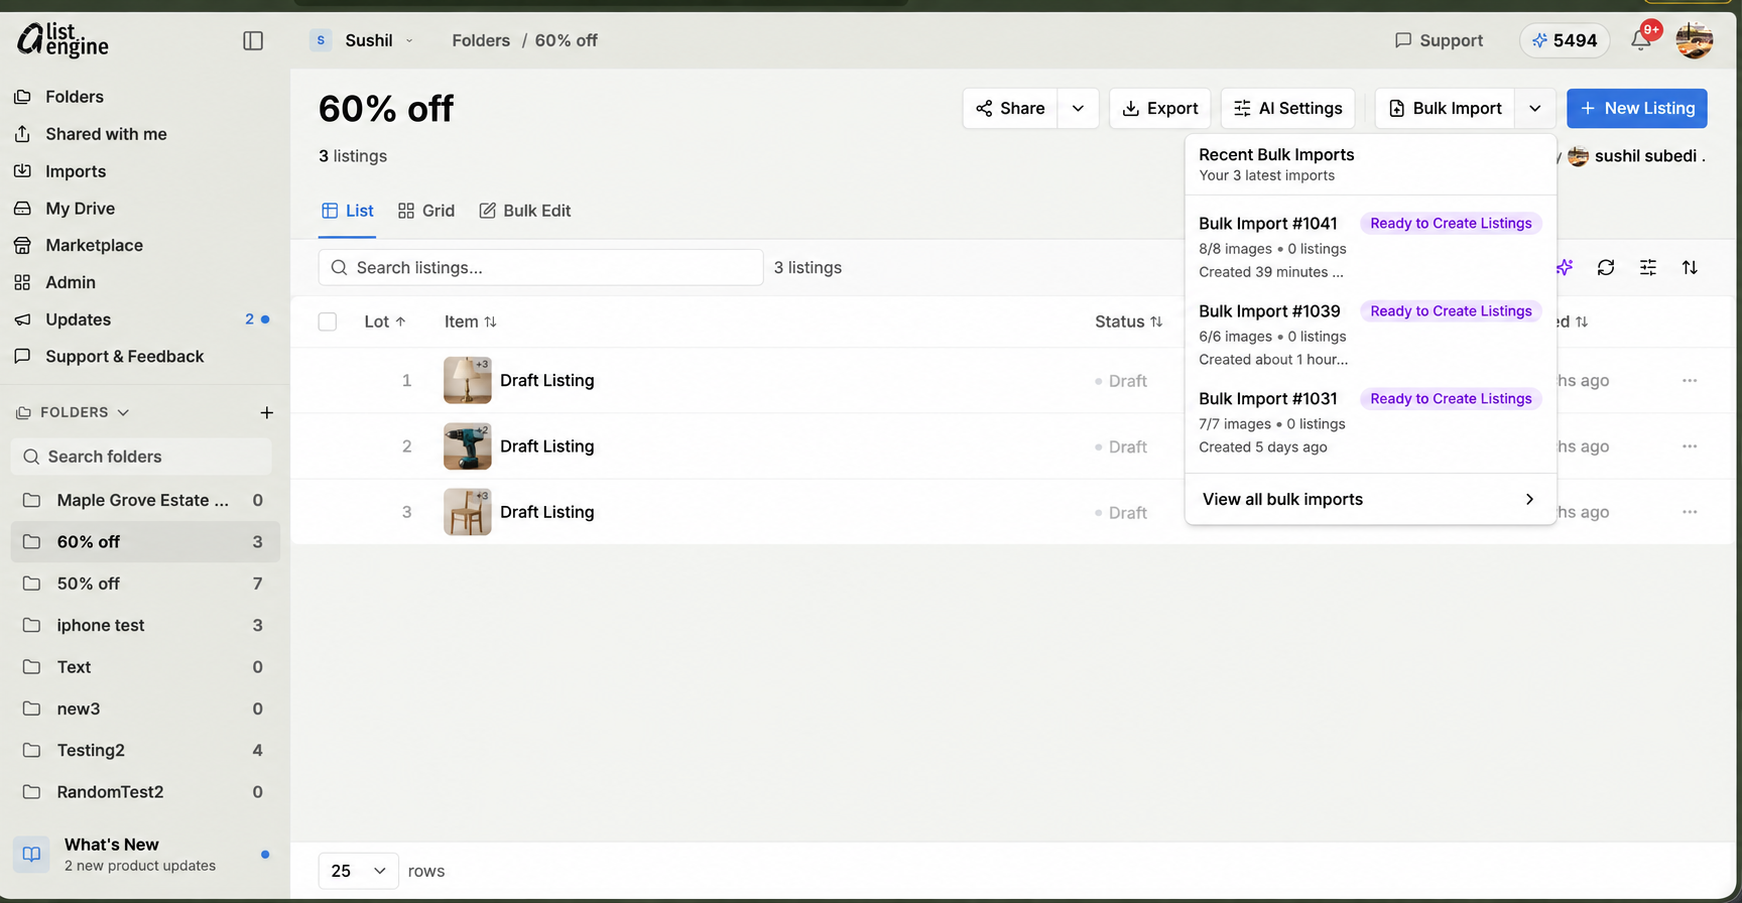
Open the same organization and folder. Click the arrow beside Bulk Import, then select your batch or View all bulk imports.
You can also browse through Imports in the sidebar. Uploaded photos can be in an import before any listings have been created.
4. Review the photos and create drafts
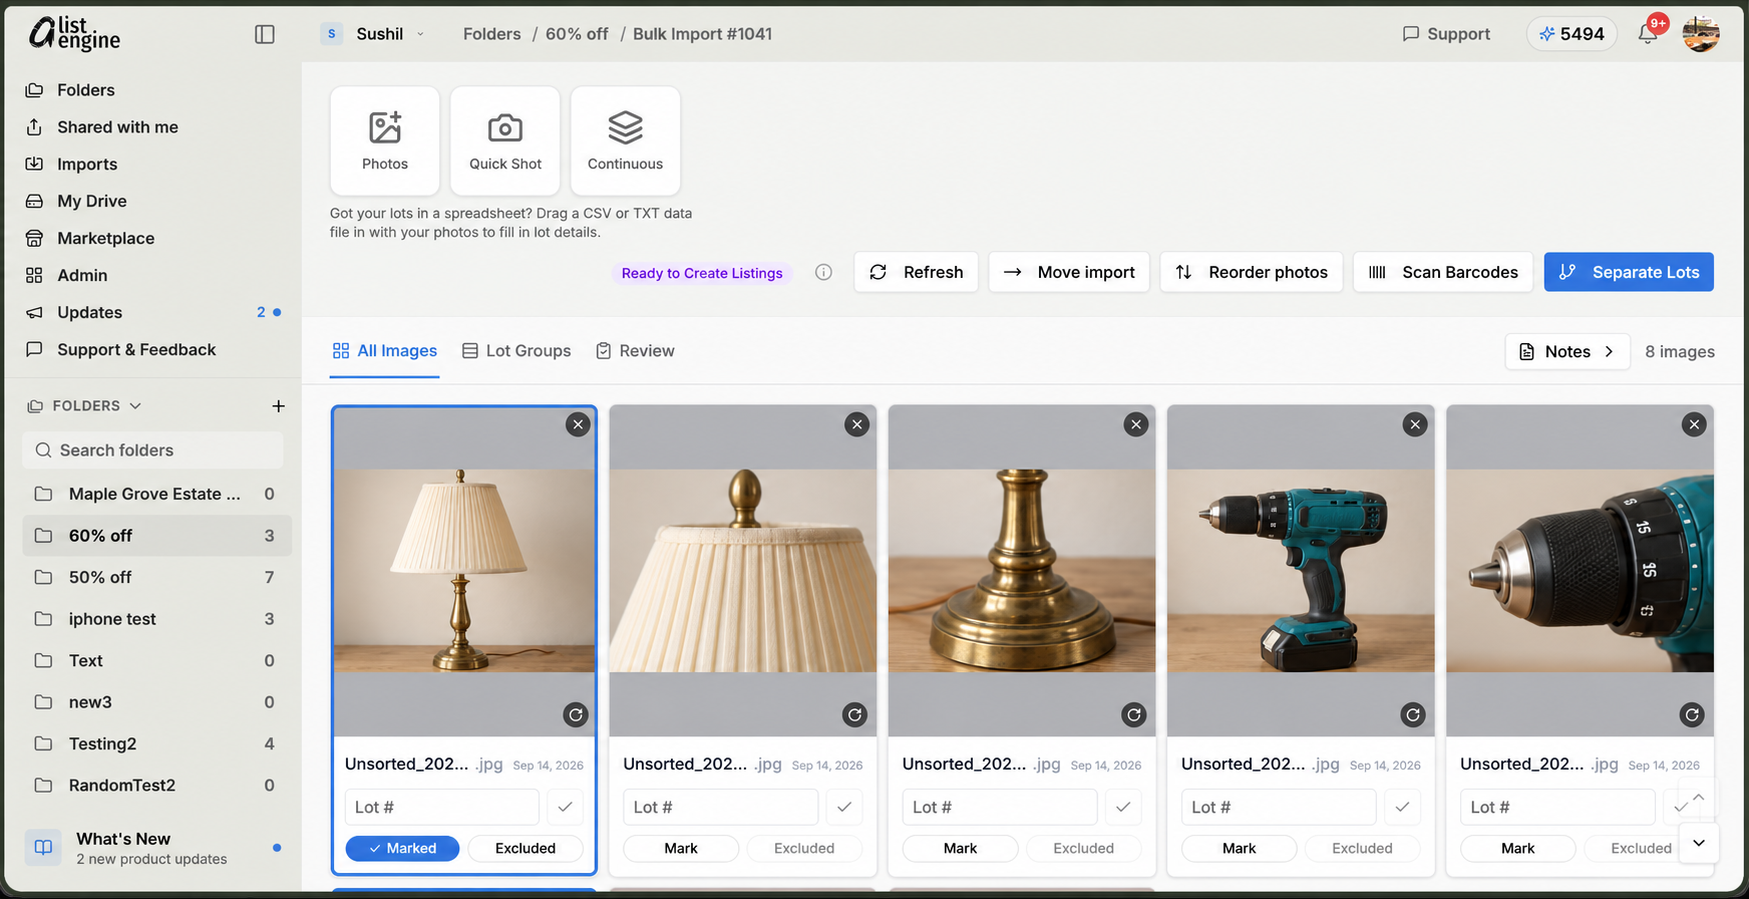
Check Lot Groups, then choose Separate Lots → Split to Drafts. Wait for listing creation to finish before reviewing the results.
Photos uploaded directly through web Bulk Import appear in an import in your organization too. Syncing does not publish an auction. Review your listings before export.
Product photos in these screenshots are edited examples. The screens show mobile import #1016 and web import #1041. For your own handoff, match the same import number on both devices.
Get the mobile app and try the workflow with a small batch.