
How to Photograph Auction Lots on Your Phone and Finish Cataloging on Desktop
Capture auction photos on your phone, keep them with the right lots, and finish description review and export on a desktop computer.
In this article
Use your phone to photograph each lot, keep the pictures with the right lot number, and then finish the catalog on a larger screen. A little care in the field saves a great deal of sorting later.
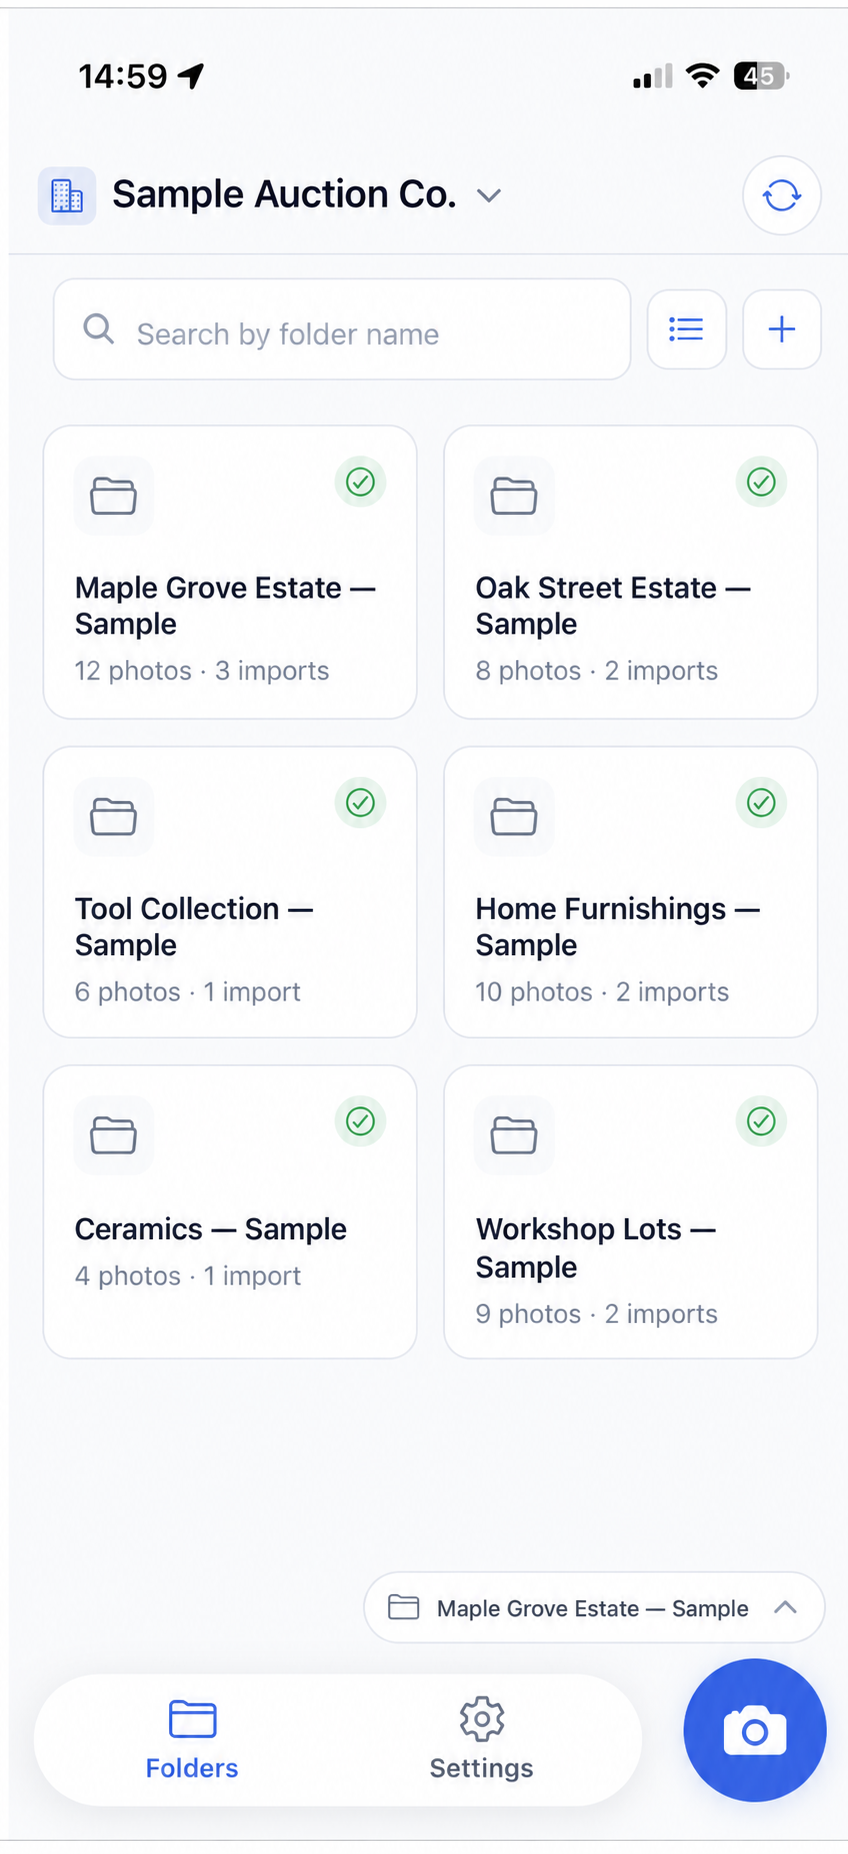
Open the correct sale folder before taking photos.
1. Set up the sale before photographing
Open the folder for the sale and create or choose the import for that session. If several people are photographing, give each person a different range of lot numbers. One person might use 101–150 and another 151–200.
Photograph one or two test lots first. Confirm that they appear in the correct folder before working through the room.
2. Use Capture or Gallery
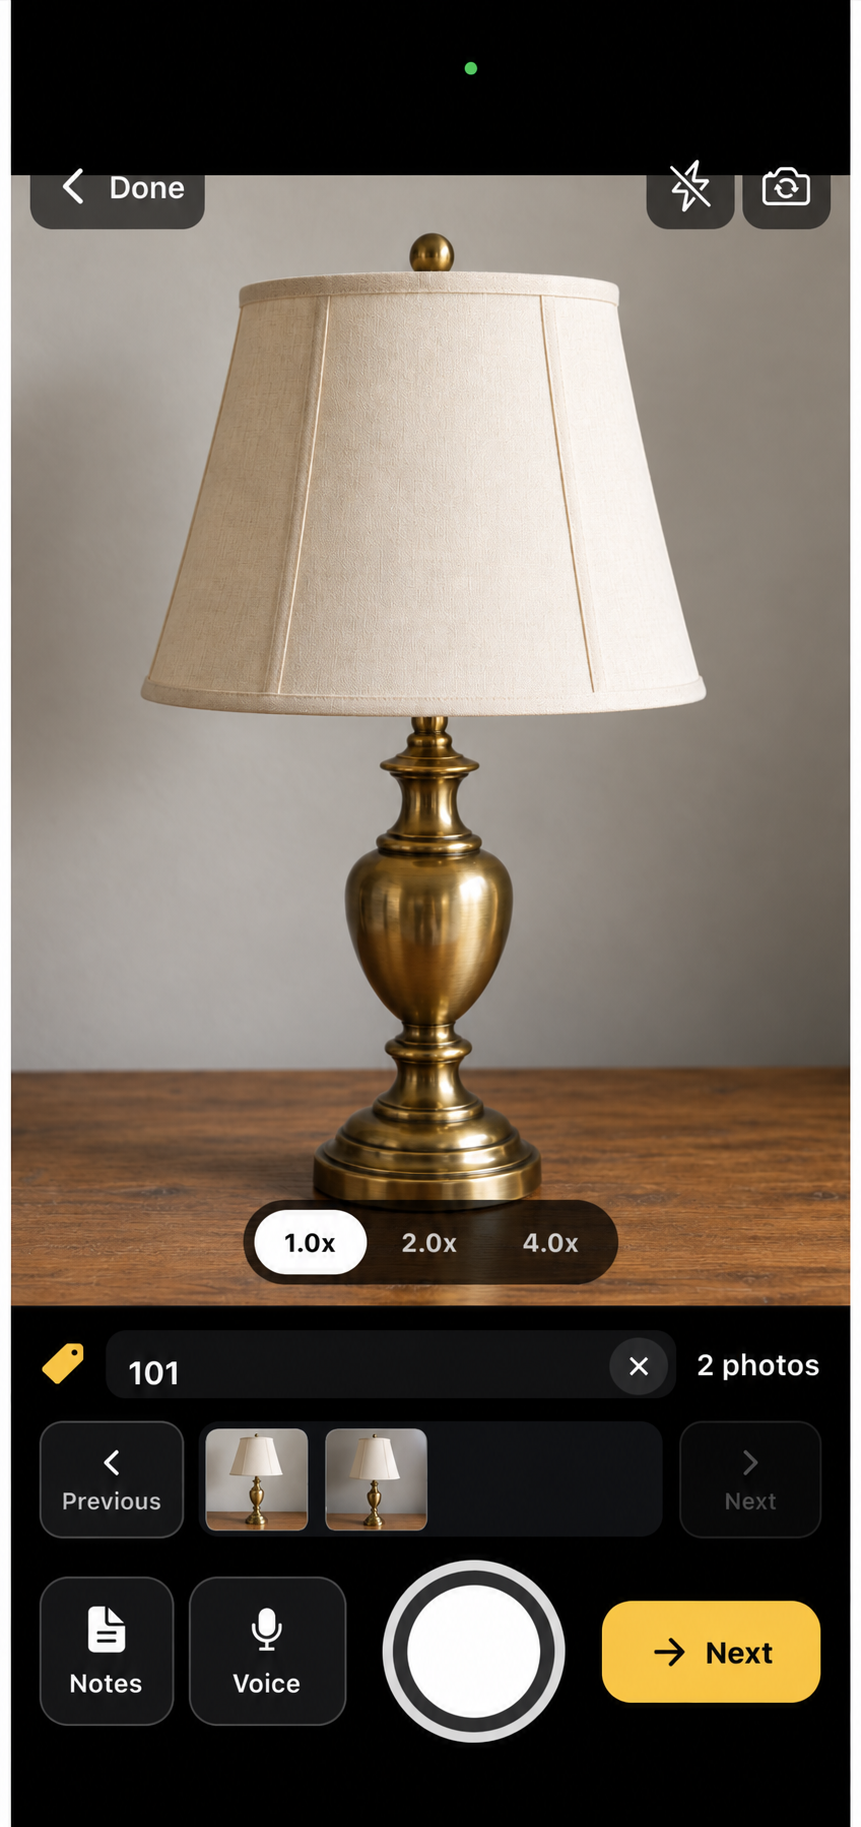
Choose Capture to take photos. Choose Gallery to open the photo gallery. Enter the lot number in the camera screen. Use Notes or Voice to record details while the item is in front of you, then choose Next when you are ready to photograph the next lot.
Photographing the sample lamp as lot 101.
Use the controls shown on your phone, since app versions can differ. Look at each photo after taking it. A sharp overall view is more valuable than several rushed pictures.
3. Photograph one complete lot at a time
Start with a view that shows the full selling unit. Then photograph labels, maker’s marks, included parts, and damage.
If two chairs are sold as a pair, show both chairs together and then take useful detail views. If a drill includes a battery and charger, place all three in the main photo. This keeps the desktop cataloger from guessing what the bidder receives.
Add a note when a fact is not clear from the photo, such as “charger included” or “powered on; no other functions tested.”
4. Check each lot before moving on
Enter the lot number when your workflow uses one. Take the needed photos and use Next to continue through the session.
Then open the grouped-lot view and check the result. Confirm the lot number, photo count, and the items shown in each group.
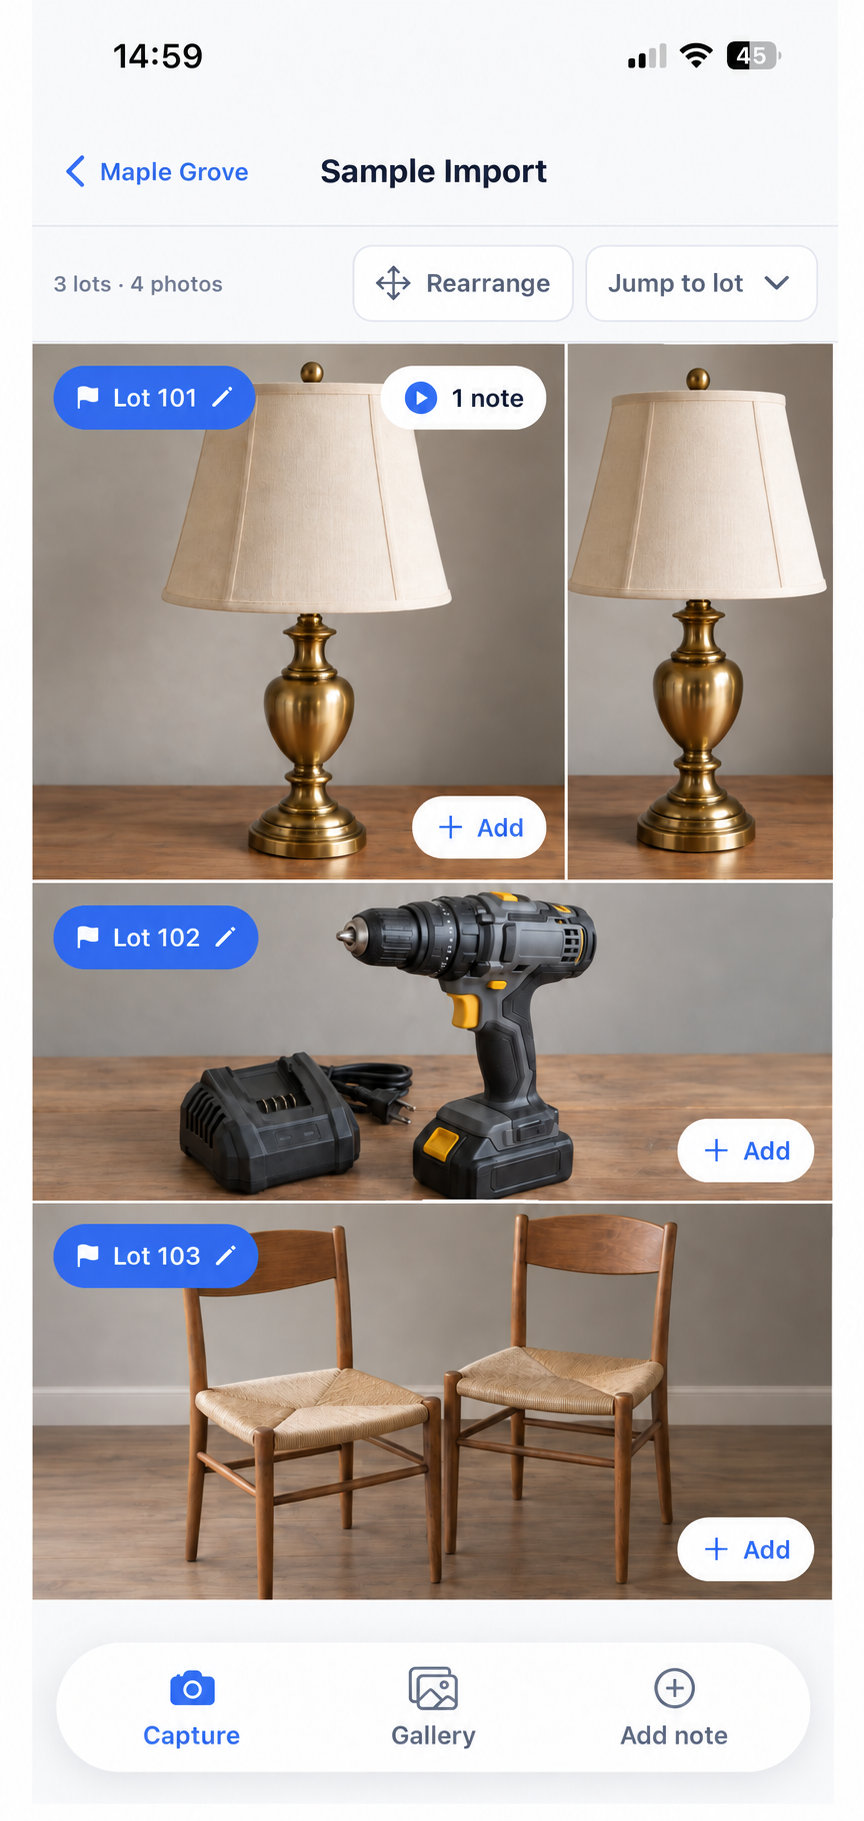
Check each lot’s number and photos before desktop review.
If a lamp photo appears with the drill, fix the group before creating listings. After each capture session, make sure the final lot has the correct number and all expected photos.
5. Confirm the photos have arrived
If you photographed offline, connect to the internet and let the app sync. Check for any upload or failed-photo message. Open the same import on your computer and compare the photo count with the phone before continuing.
Keep the originals on the phone until someone has opened the same batch on desktop. This is especially helpful at estates with weak service or crowded wireless networks.
Tell the desktop cataloger the folder name, import, number range, and any questions that still need an inspection.
6. Finish on desktop
On your computer, choose Imports in the sidebar and select the same batch. Choose Open in full page to reach Bulk Import. Check the photo order and Lot Groups. When they are correct, choose Separate Lots, review the number of drafts and photos, then choose Split to Drafts. Wait for the new listings to be created before opening them.
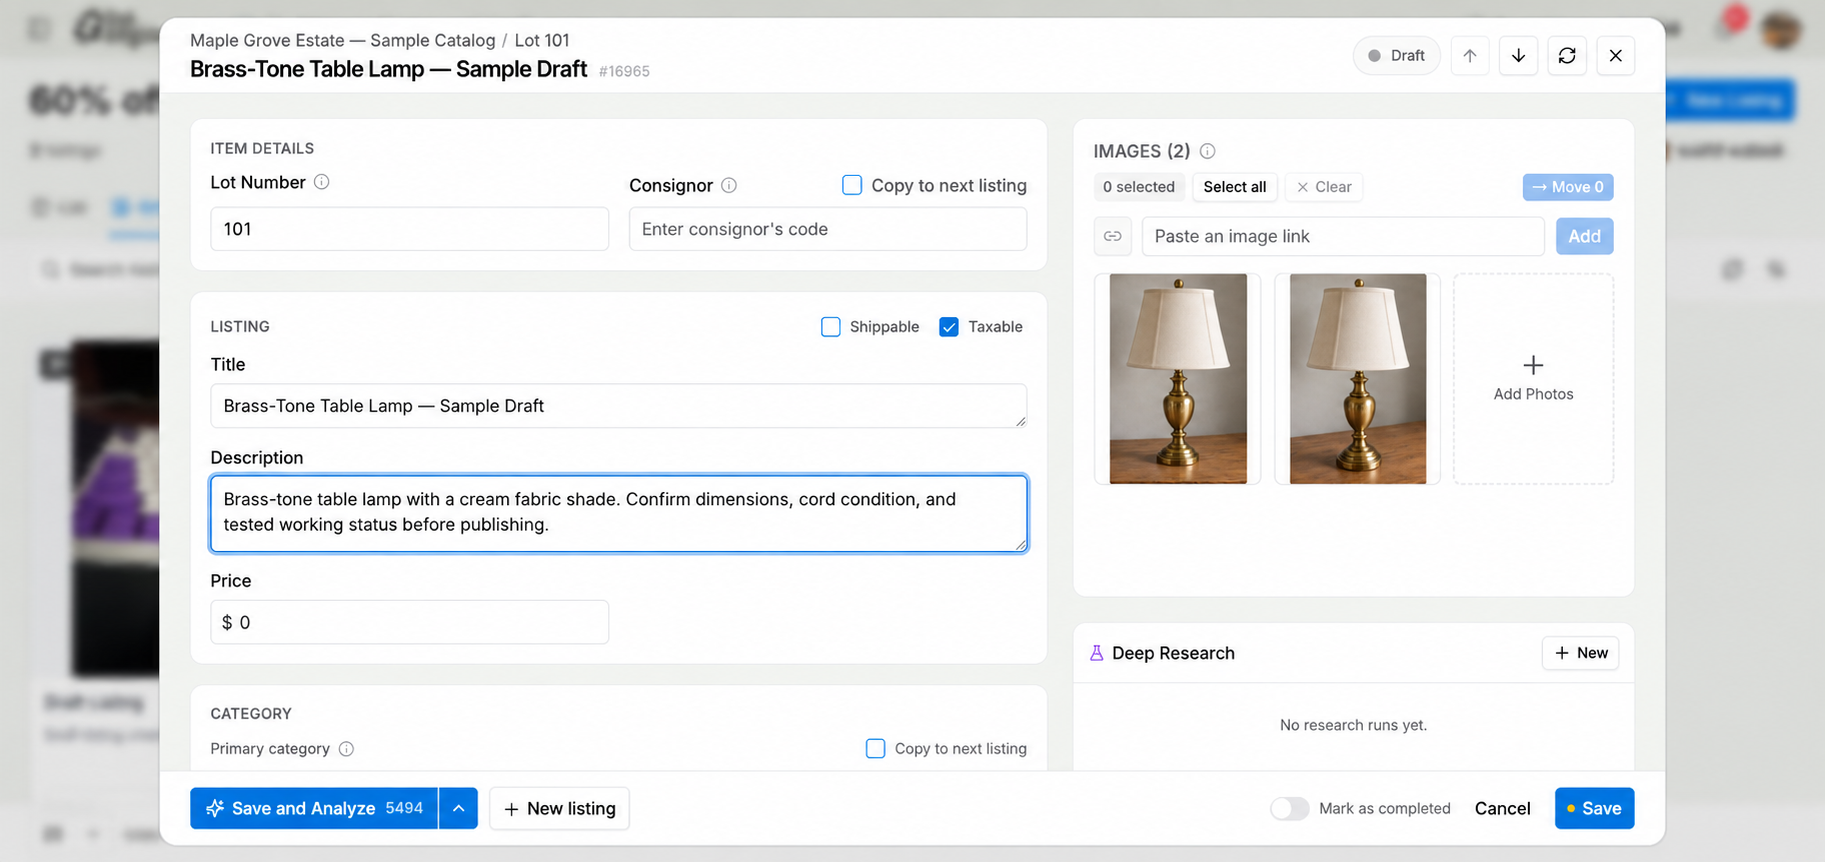
The listing editor appears after you create and open a listing. Review its description beside the photos.
Open the new listings and compare each description with its photos. Check identity, condition, included items, and testing notes. Choose the best lead photo and make any corrections before export.
Uploading photos does not publish the auction. Your team still reviews the catalog and imports it into the chosen auction platform.
Common questions
Do I need to email the photos to myself?
No. Once the photos are in the correct aListEngine import, open that same import on desktop. Keep the phone originals until you confirm the handoff.
Can two people photograph the same sale?
Yes. Agree on folders and number ranges first, then check for repeated numbers on desktop.
Use the same routine for every room
See aListEngine’s auctioneer workflow and try a few lots from phone capture through desktop review before handling a full sale.