
How to Import aListEngine Listings into BidWrangler
Export a catalog CSV, match the item fields, prepare photo filenames, and review the BidWrangler import.
In this article
Move a reviewed aListEngine catalog into BidWrangler by downloading the CSV and photos, matching the fields, and checking the imported items.
This guide covers item imports into an auction. Begin with a small batch and confirm the destination auction before saving the import.
1. Finish the listing review
Check the lot numbers, titles, descriptions, and included items in aListEngine. Save any corrections before downloading the export.
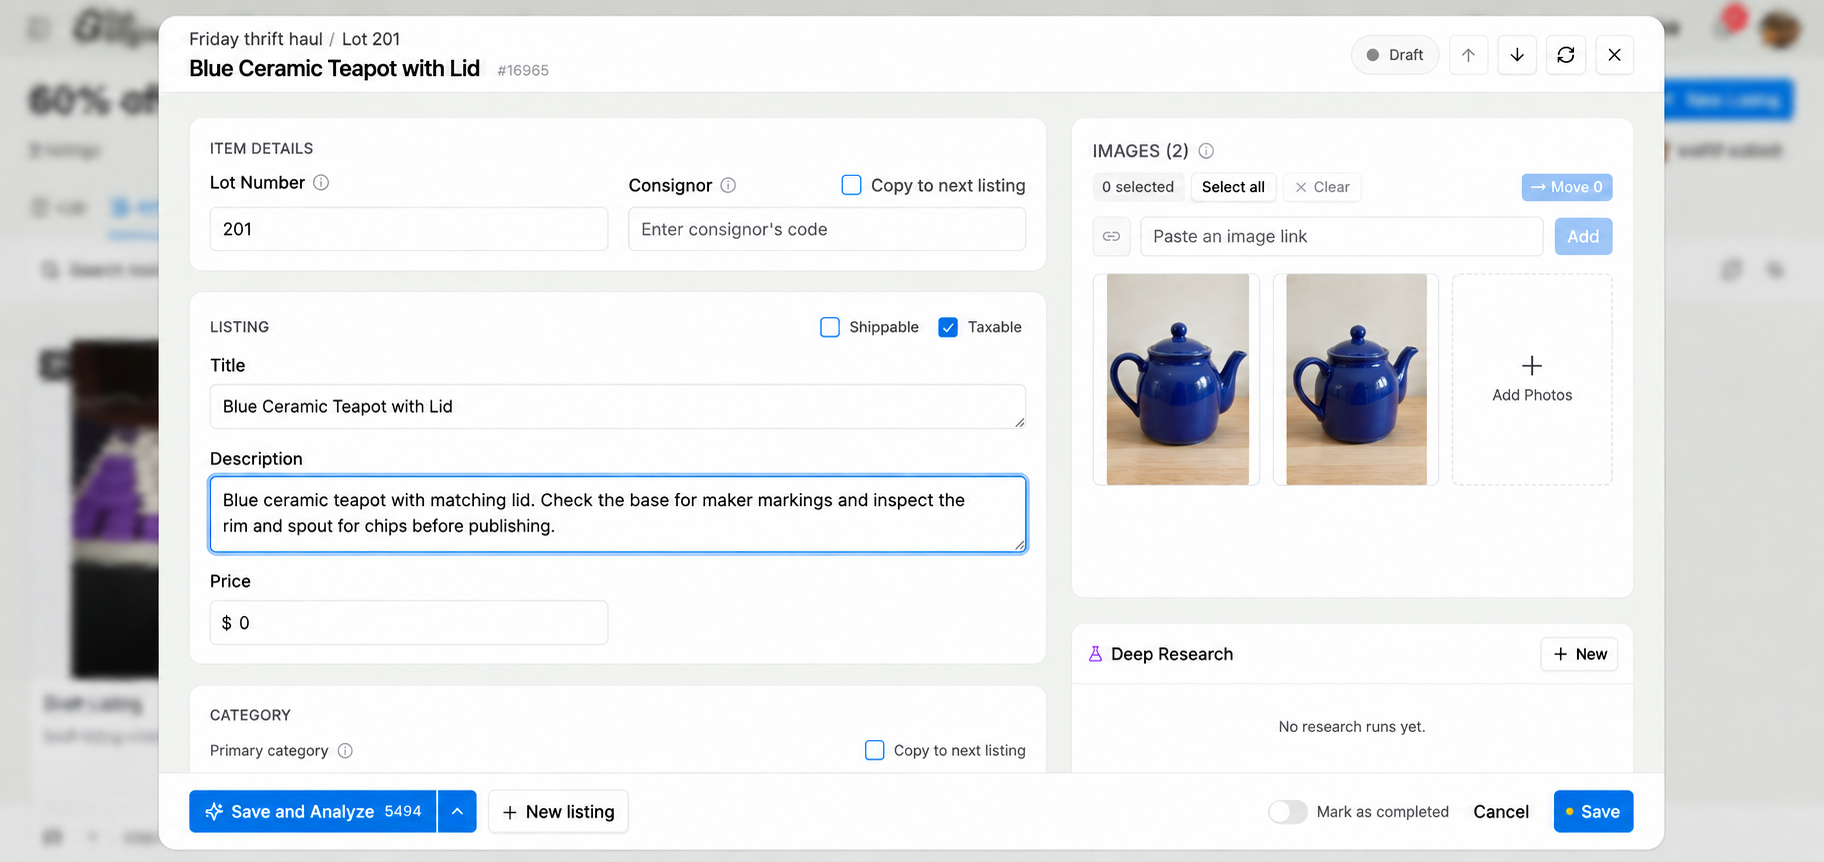
Finish the description while the photos are beside it.
For this batch, use lot 201 for a blue teapot, 202 for a backpack, and 203 for a pair of sneakers. Keep both teapot photos in lot 201.
2. Choose Bid Wrangler in Export
- Open the folder containing the reviewed listings.
- Choose Export and select Bid Wrangler.
- Include the images and download the export.
- Extract the ZIP to access the CSV and photo files.
The file includes these columns:
| Column | What aListEngine puts there |
|---|---|
| Lot identifier | Your lot number |
| External guid | The aListEngine listing ID |
| Name | The reviewed title |
| Description | The reviewed description |
| Starting bid | Blank, for you to set |
| Quantity | 1 per listing |
| Suggested price, Low estimate, High estimate | Reference values for review |
Keep External guid intact. BidWrangler requires it along with Lot identifier. Set seller numbers using existing BidWrangler seller records; our export does not supply that field. BidWrangler’s field definitions.
3. Prepare the photo filenames
Our current Bid Wrangler export uses underscores, such as 201_1.jpg. BidWrangler’s published instructions show dashes, such as 201-1.jpg. Rename the extracted copies to that documented pattern before uploading:
| Exported file | Rename the copy to |
|---|---|
| 201_1.jpg | 201-1.jpg |
| 201_2.jpg | 201-2.jpg |
| 202_1.jpg | 202-1.jpg |
| 203_1.jpg | 203-1.jpg |
Keep the lot number unchanged. Open the photos once more to confirm that the two 201 files both show the teapot.
4. Create an item import
In BidWrangler’s Admin Portal, open Items import → Create. Attach the extracted CSV under items csv and check the proposed column matches. The official item-import guide shows the screens.
Map Name to the item name, Description to the description, and Lot identifier to the lot identifier. Keep estimated values out of Starting bid. Leave reference columns unmapped if you are not assigning them to a supported field.
Confirm which auction will receive the items. Our export does not include an auction identifier, so do not assume that choosing the CSV alone assigns the correct sale.
5. Add the extracted photos
Add the image files to the import. BidWrangler’s item-import instructions accept individual images or a folder, but say not to upload a ZIP of images. Review the column matches and photos before choosing Save, then check Items import for errors. Photo upload and save instructions.
Treat Save as a consequential step: check the auction’s visibility settings beforehand so unfinished items are not shown to bidders.
6. Check the imported items
Open lots 201, 202, and 203. Confirm the title, description, photos, seller, starting bid, and quantity. The pair of sneakers is one listing; make sure your quantity and bidding setup reflect how you are selling it.
Why is the starting bid empty?
Our export leaves it blank. Set the opening bid deliberately instead of using the expected selling price.
Why are the photos missing?
Check that you extracted the ZIP, used the documented dash filenames, and uploaded image files rather than the ZIP package.